
- Gepost door: Kyriacos Antoniades
- Datum: 03 Oct, 2022
- Category:
MLOps with CI/CD on local Git repository
Train, deploy, and host your models on AWS.
- We will download code from an S3 bucket to use throughout this workshop.
- It contains image classification (MNIST) code using ConvNets based on PyTorch examples, and a CloudFormation stack.
- You will push this code to your GitHub repository as an initial step to create CI/CD pipeline.

1. Prerequisites
Open and log in to your AWS account
Open and log in to your GitHub account
If not already done, Install Visual Studio Code (VSC)
If not already done, Install Git Bash
(Optional) Configure Git Bash as the default terminal for VSC
- Click on View Then Terminal
- After the Terminal appears, press the F1 key
- Type the following, Terminal: Select Default Profile
- Select from the dropdown, Git Bash
Either, clone the GitHub repository in the local Git repository
git clone https://github.com/smartworkz-kyriacos/mlops-sagemaker-ci-cd.gitOr, download the code, and unzip it in the local Git repository folder path.
Then
cmdfrom File Explorer in the path field
- Using File Explorer navigate to the local Git Repository
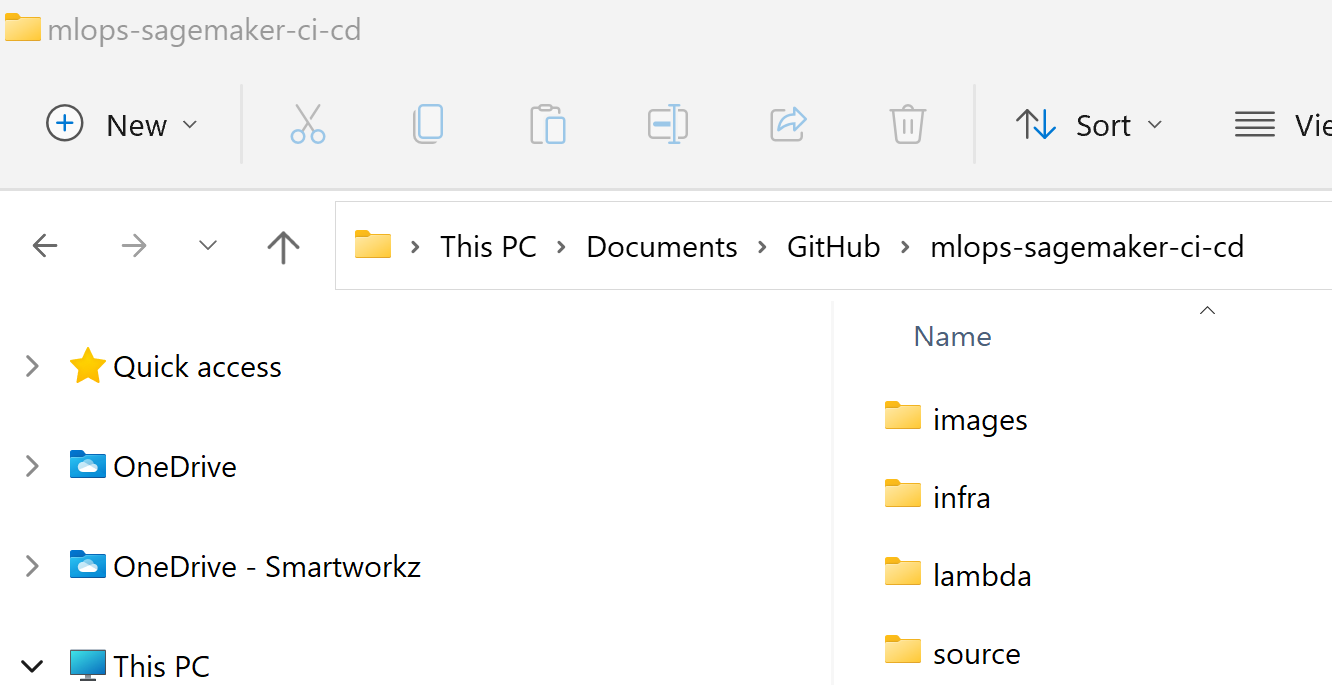
- In the path field type cmd and press the Enter key

- A cmd window opens in the repository path.

- Type
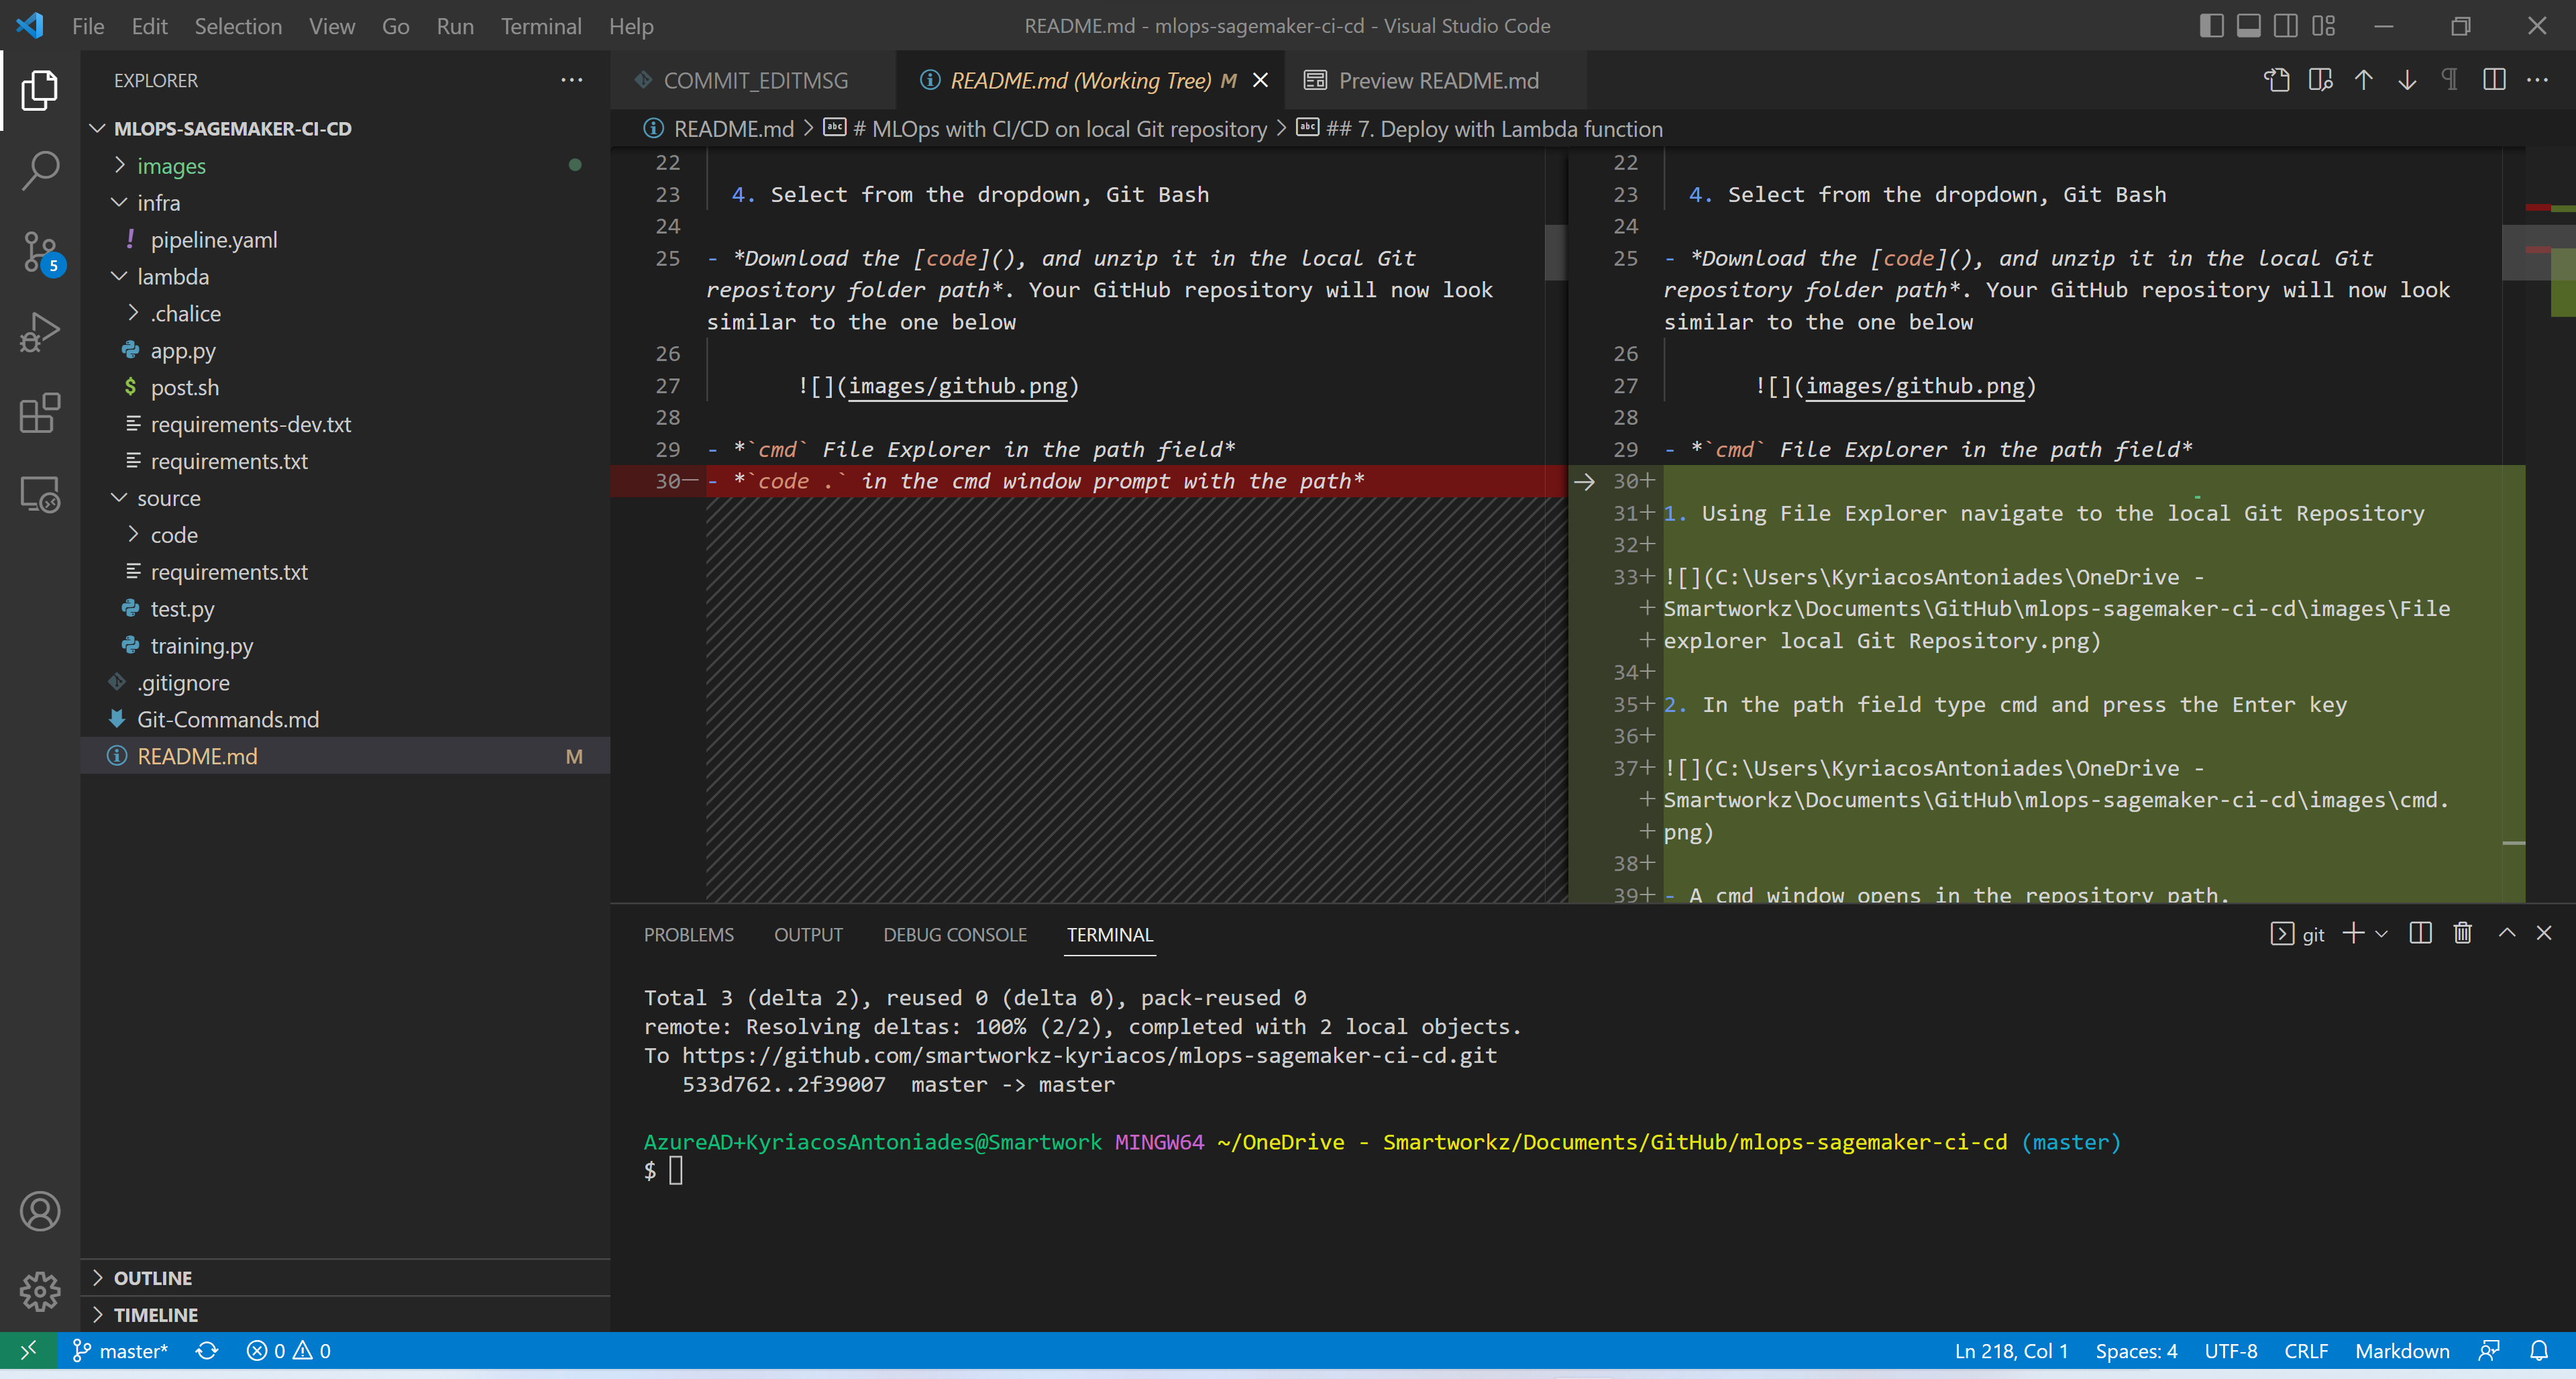
code .in the cmd window prompt with the path

- VSC opens automatically.
- Open your GitHub account Repositories page
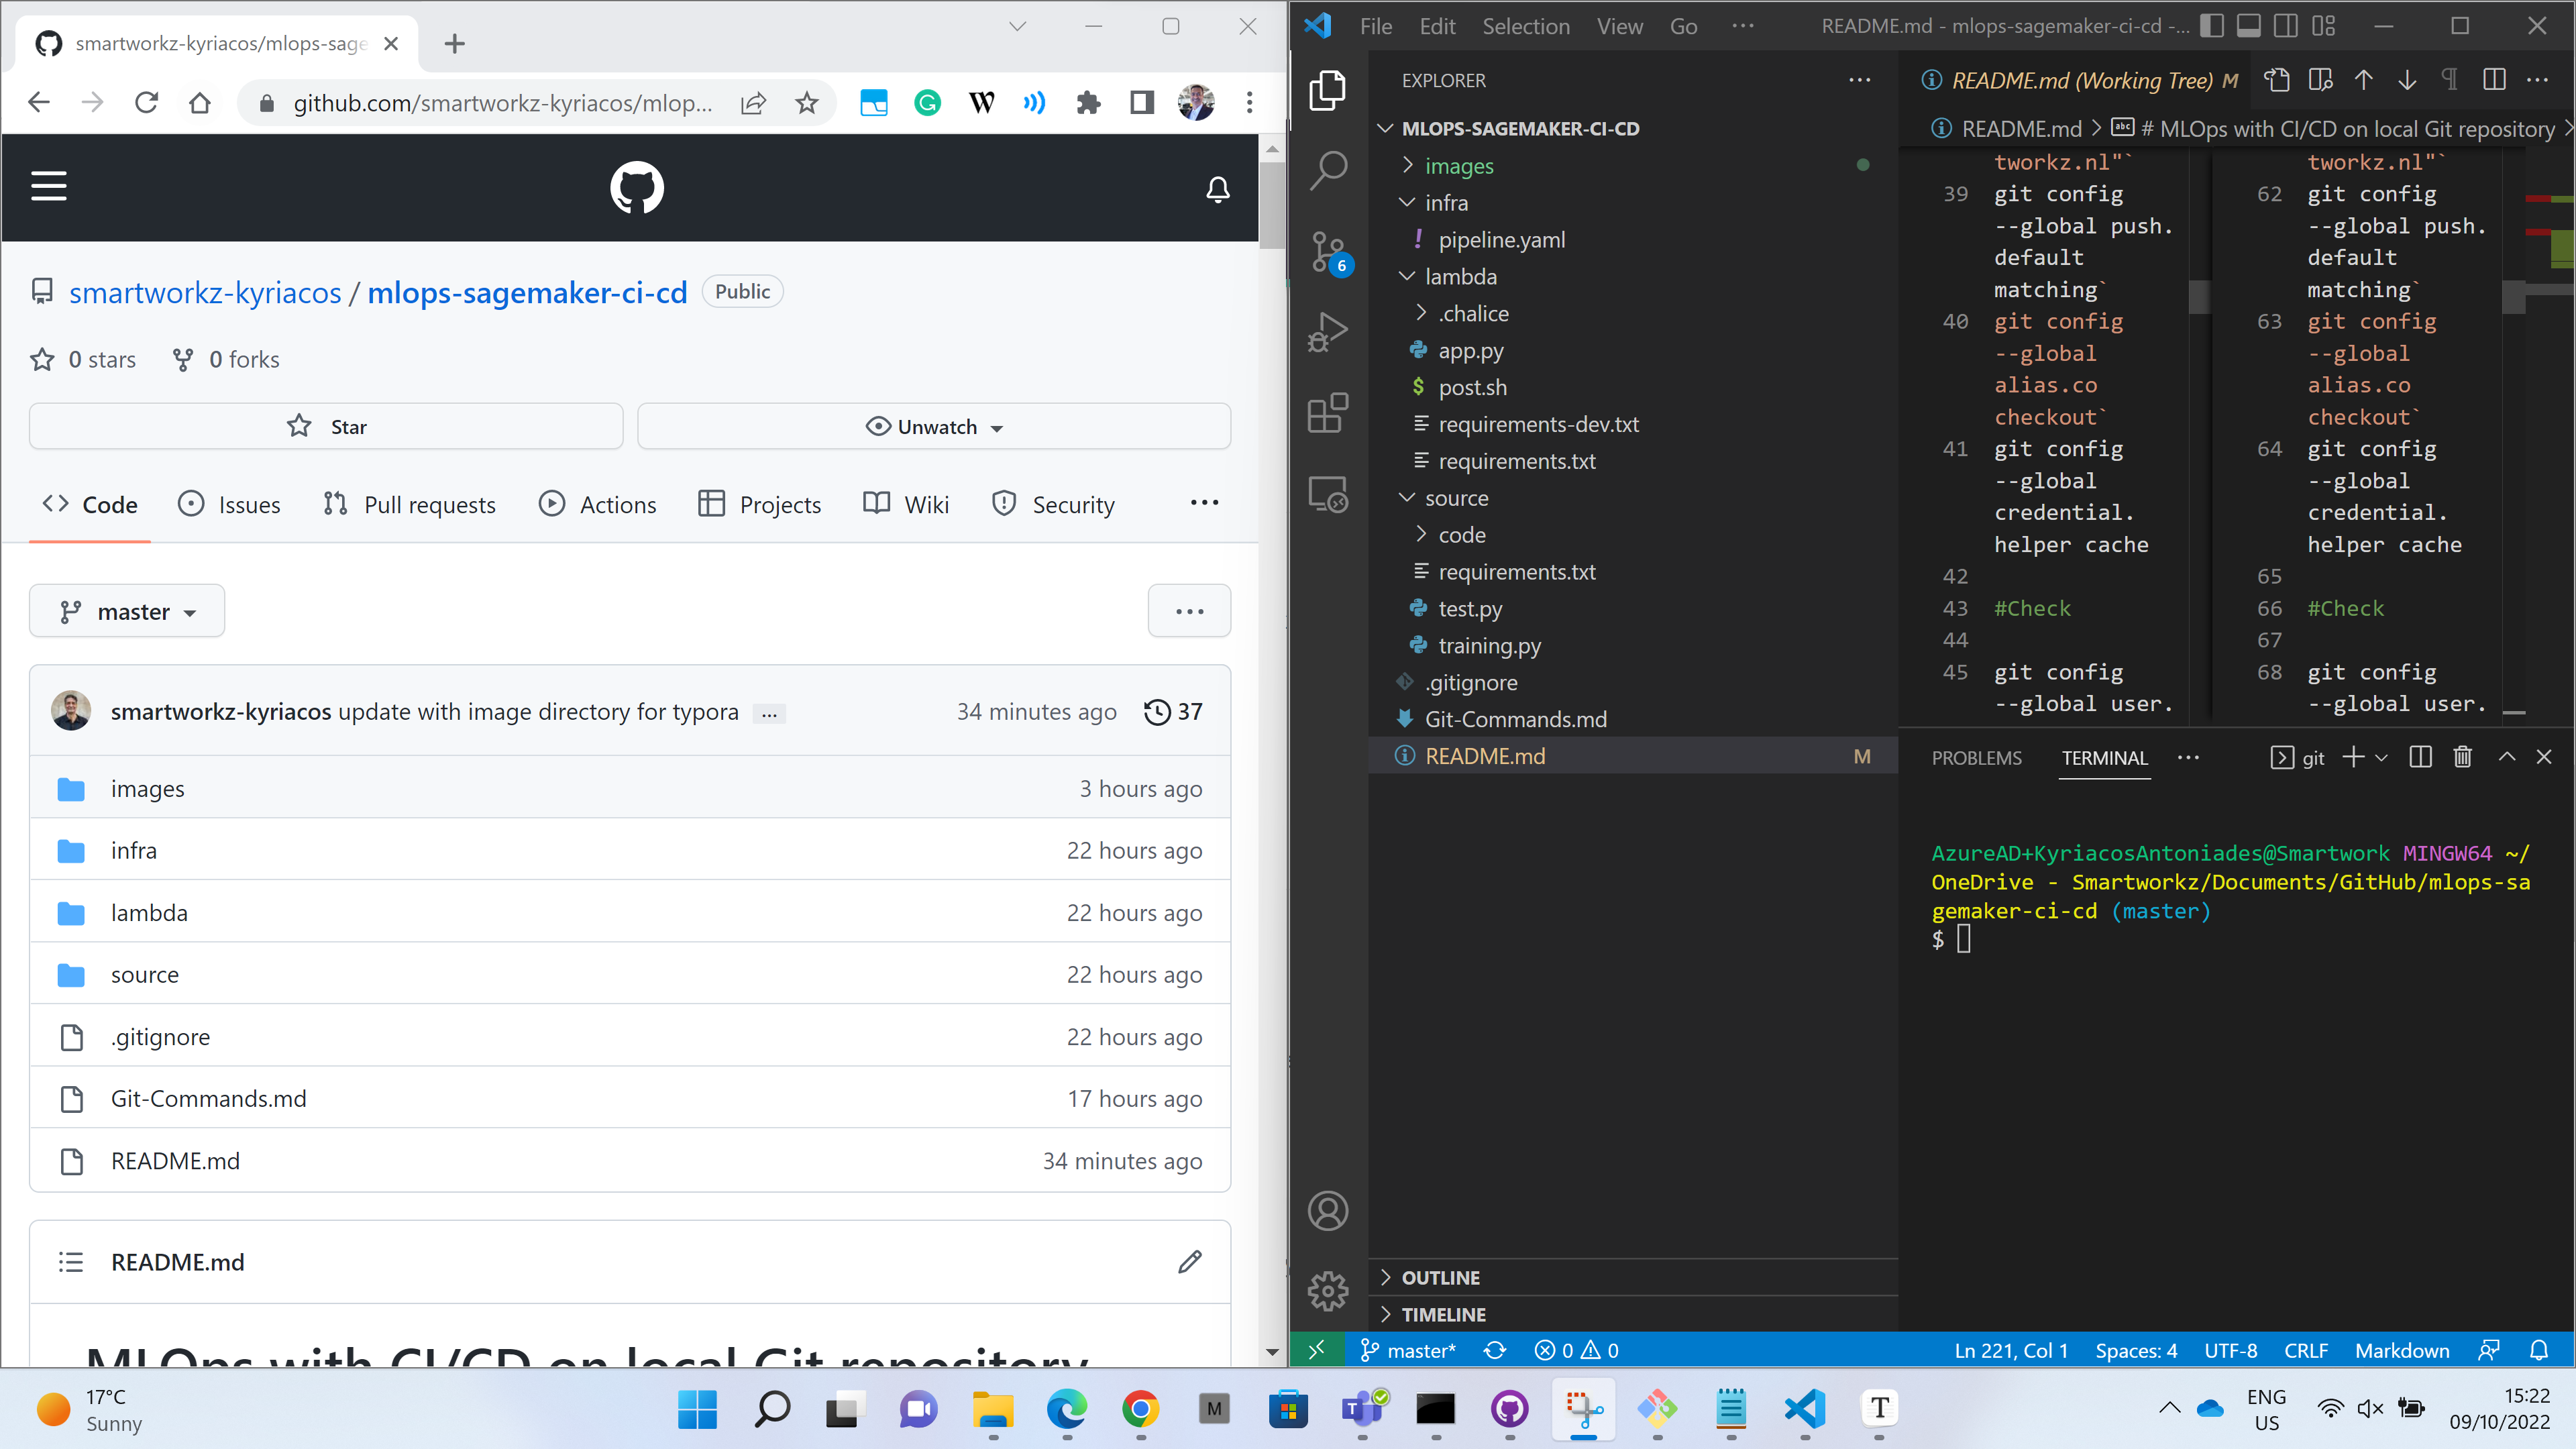
Make sure the Git Bash terminal is in VSC (arrange it side-by-side with the GitHub page).

Run the following commands:
#Configure global settings
git config --global user.name "Kyriacos Antoniades- Smartworkz"`
git config --global user.email "Kyriacos@smartworkz.nl"`
git config --global push.default matching`
git config --global alias.co checkout`
git config --global credential.helper cache
#Check
git config --global user.name`
git config --global user.email`
#Initialize
git init`
git status`
git add .`
git commit -m "MLOPs code remote upload from the local repository"
#Push to the main branch*
git push
- Create a GitHub Personal Access Token (PAT)
In the upper-right corner of any page, click your profile photo, then click Settings.

In the left sidebar, click Developer settings.
In the left sidebar, click Personal access tokens.

Click Generate new token.

Give your token a descriptive name.

To give your token an expiration, select the Expiration drop-down menu, then click a default or use the calendar picker.

Select the scopes or permissions, you’d like to grant this token. To use your token to access repositories from the command line, select repo.

Click Generate token.


Warning: Treat your tokens like passwords and keep them secret. When working with the API, use tokens as environment variables instead of hardcoding them into your programs.
- Save locally e.g. in a text file. Will be used shortly to specify in the stack details later.
2. Create the MLOps pipeline
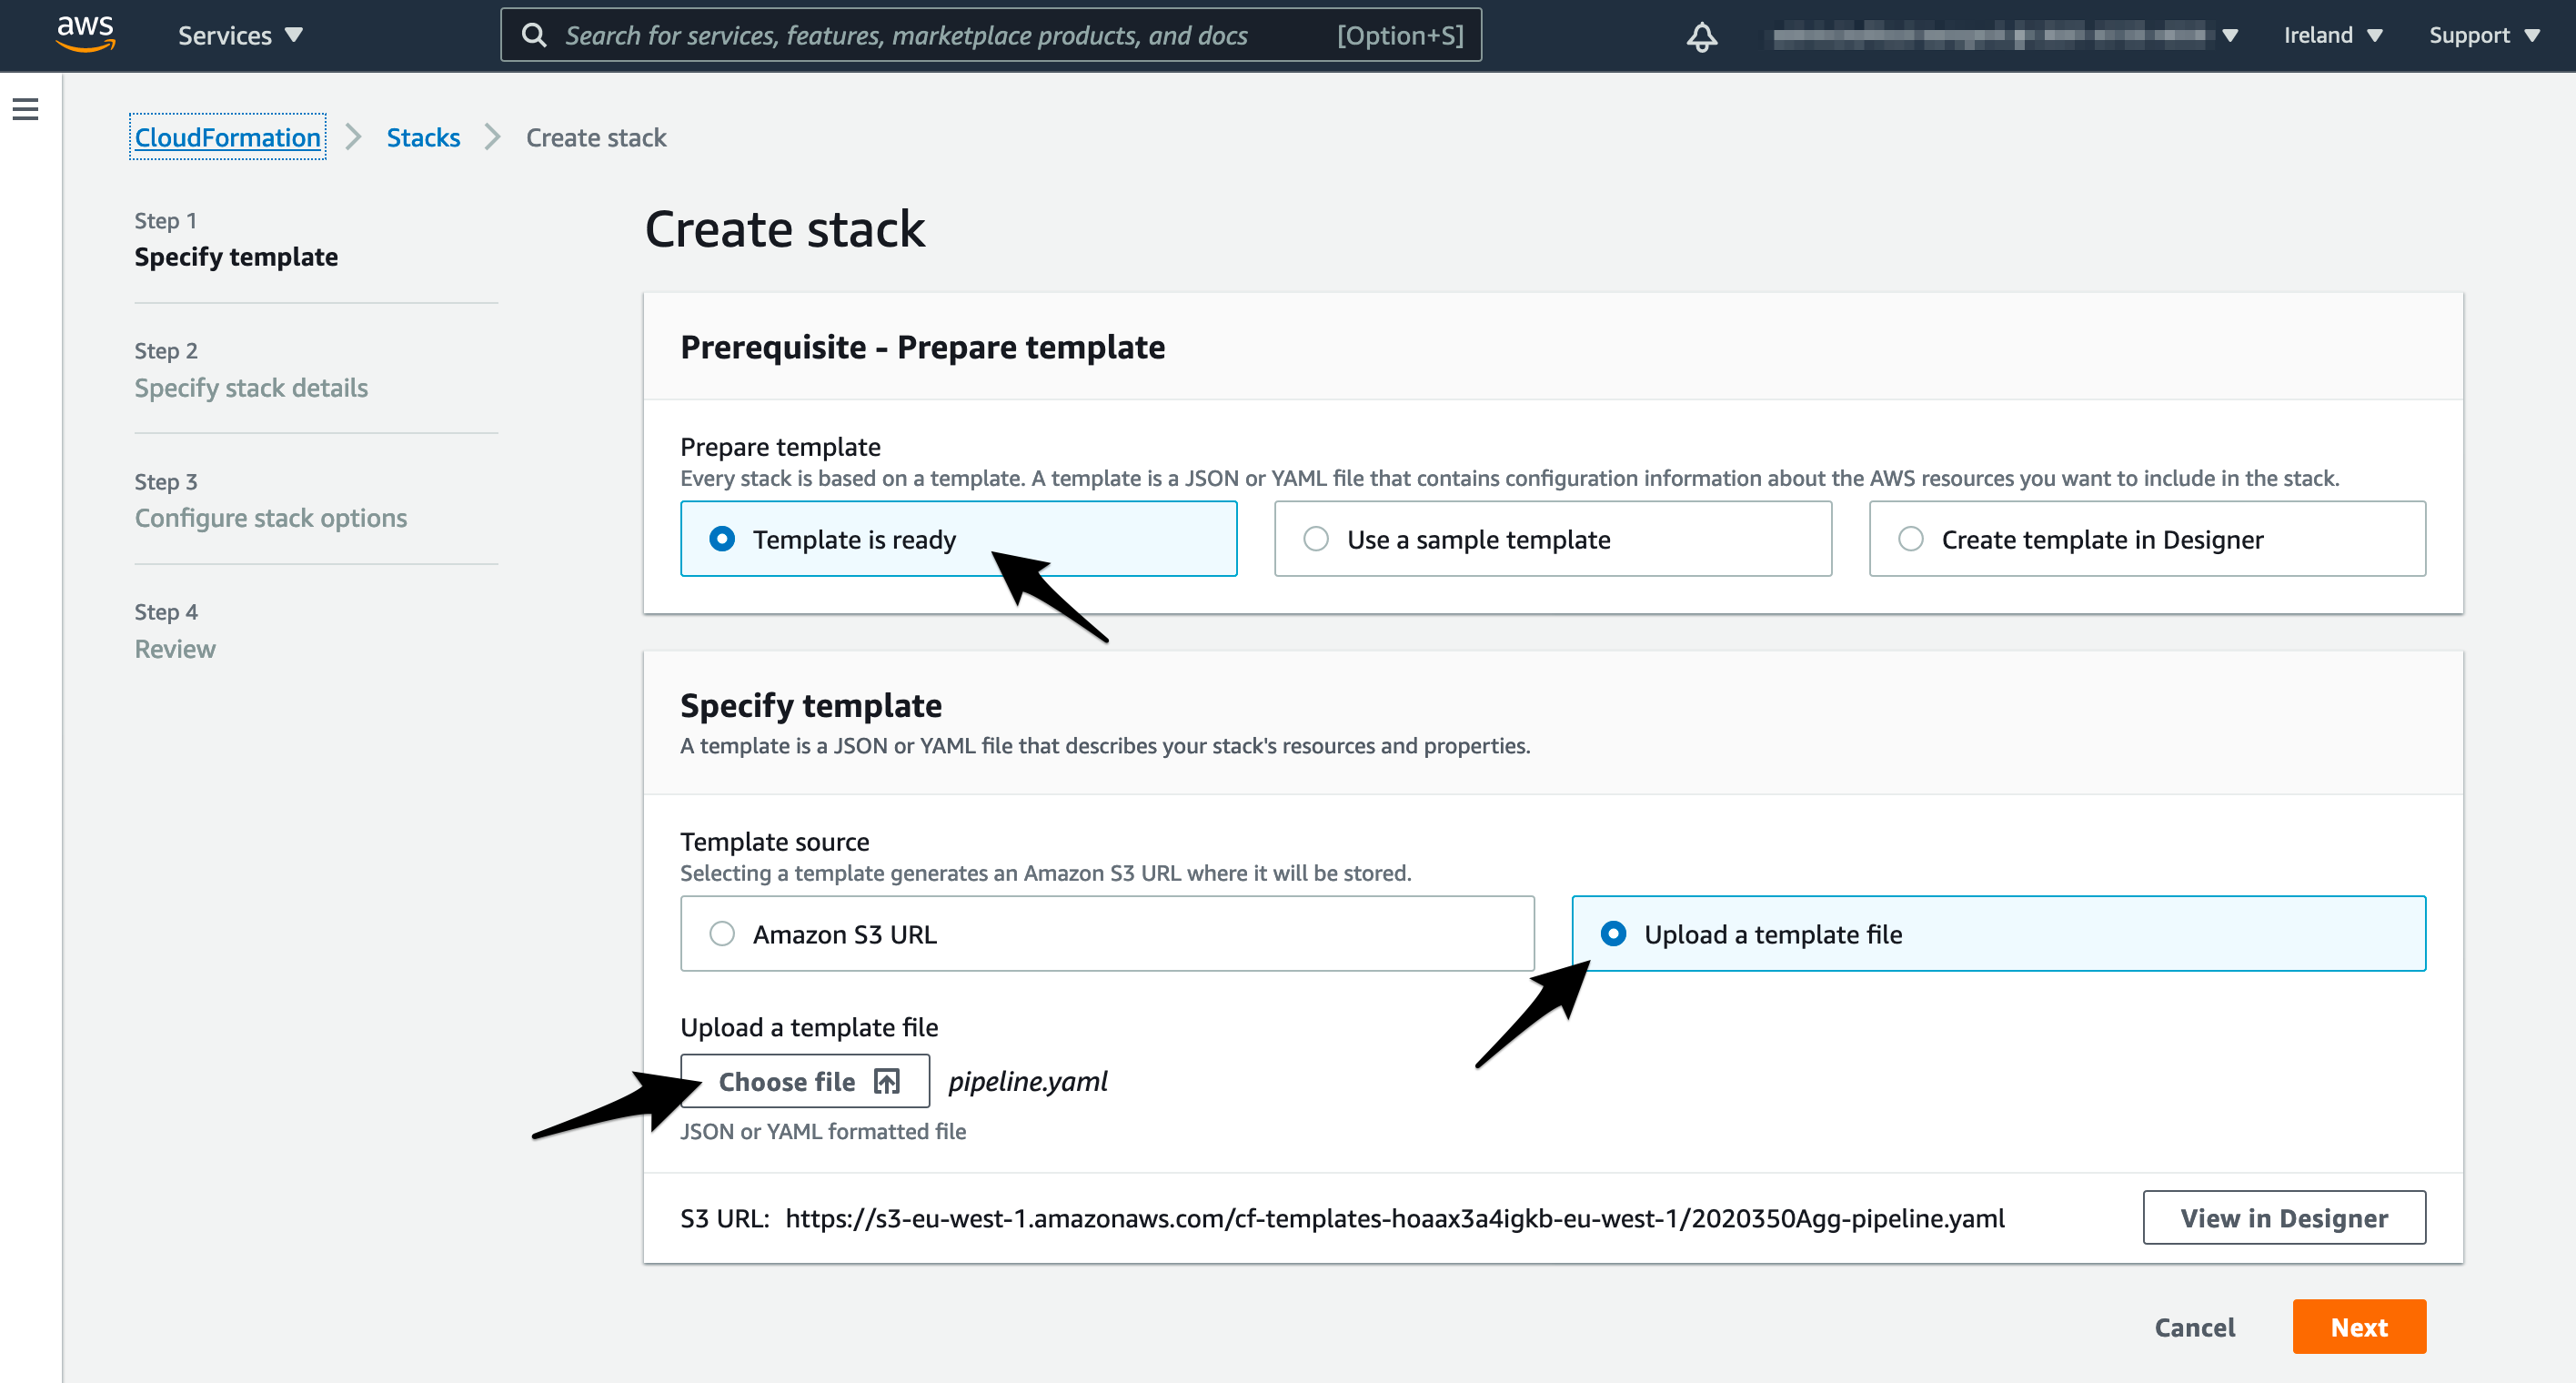
- Navigate to the CloudFormation service
- Select Create stack
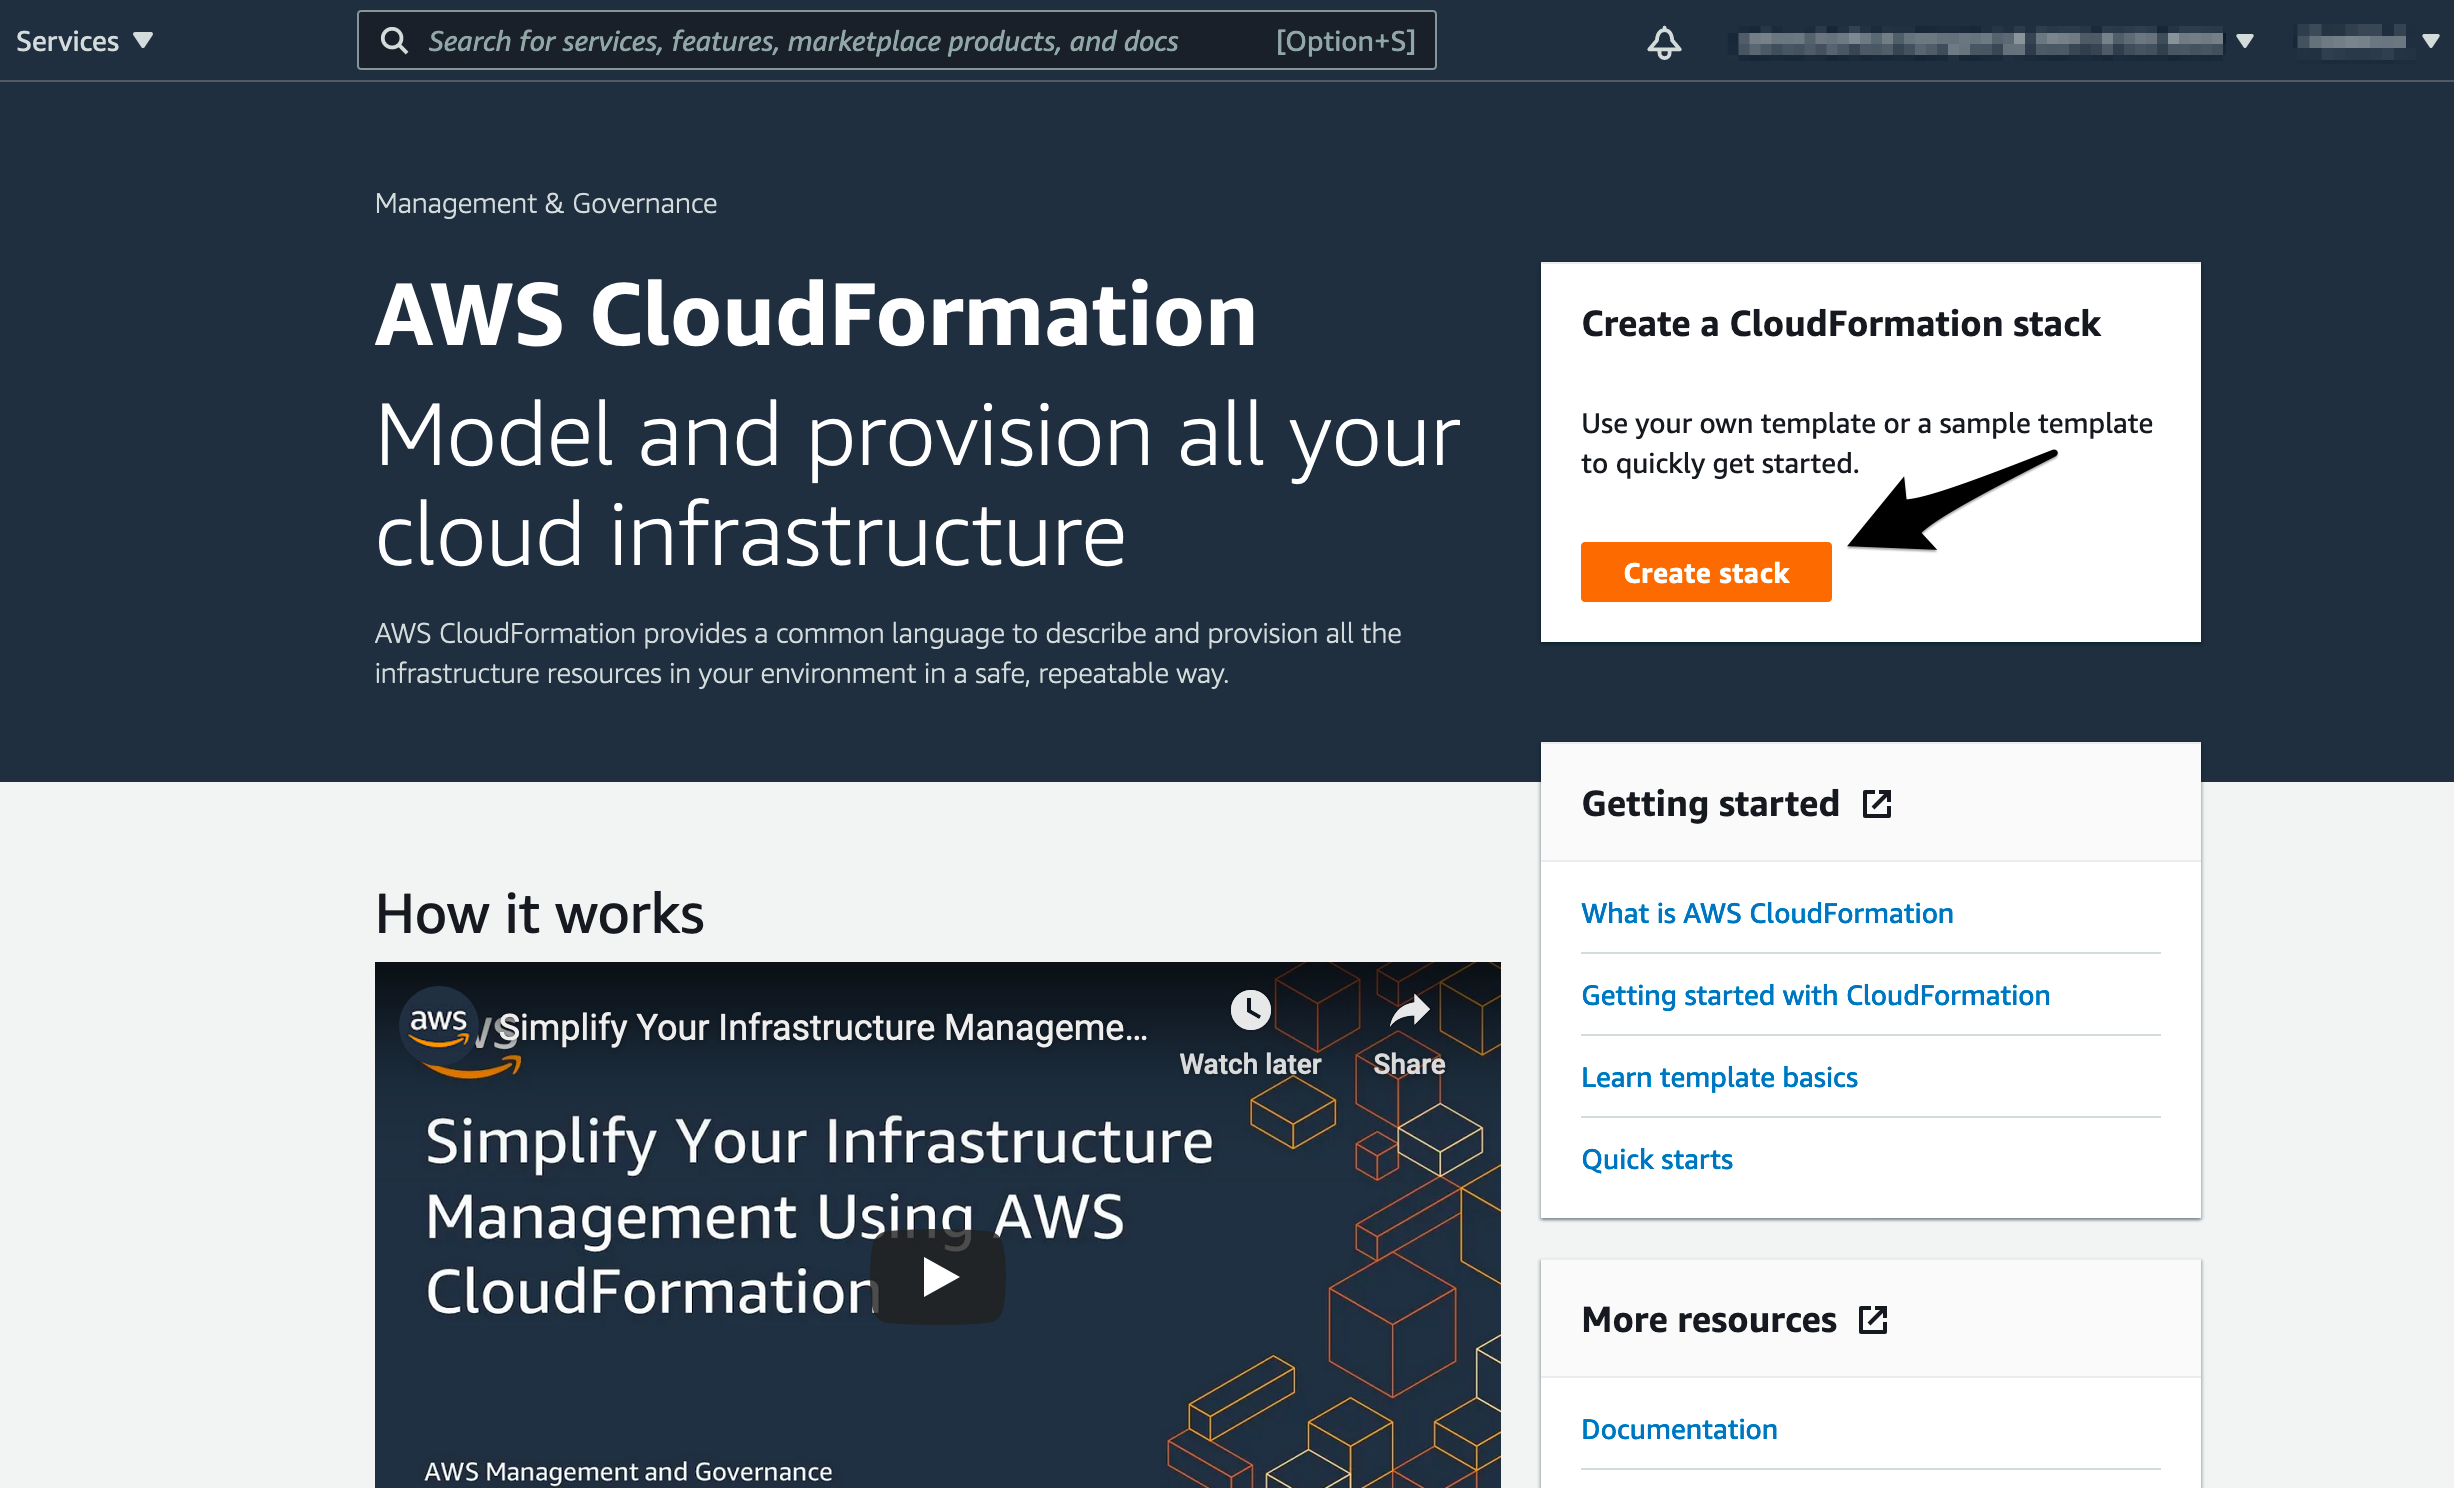
- Select Upload template file and upload the YAML file from the infrastructure folder called
infra/pipeline.yml
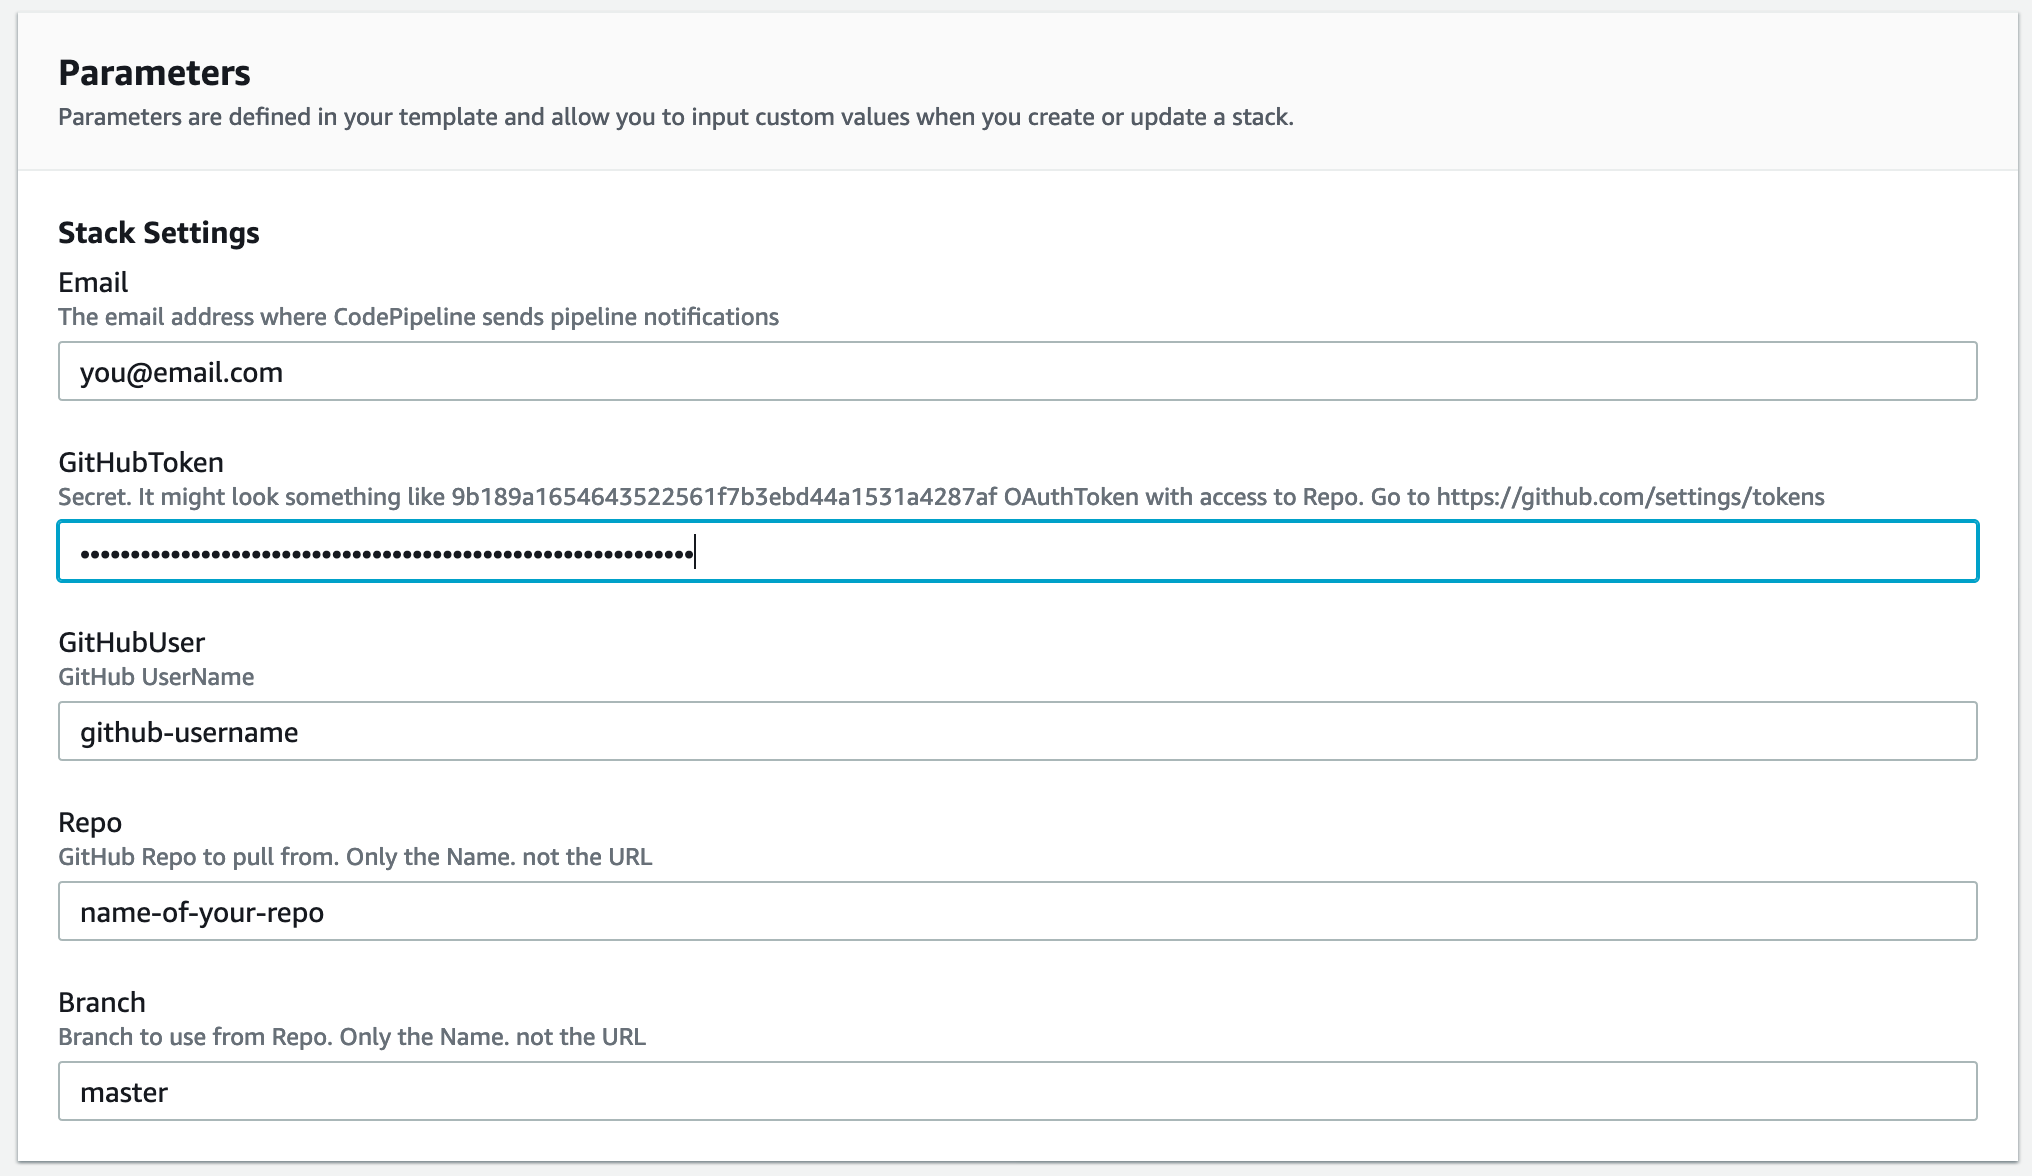
- Specify the stack details. These include:
- Stack name: mlpipeline
- Email: Kyriacos@smartworkz.nl (to receive SNS notification)
- GitHub Token: {previously generated and saved locally}
- GitHub User: smartworkz-kyriacos
- GitHub Repository: mlops-sagemaker-ci-cd
- Branch: master (main)
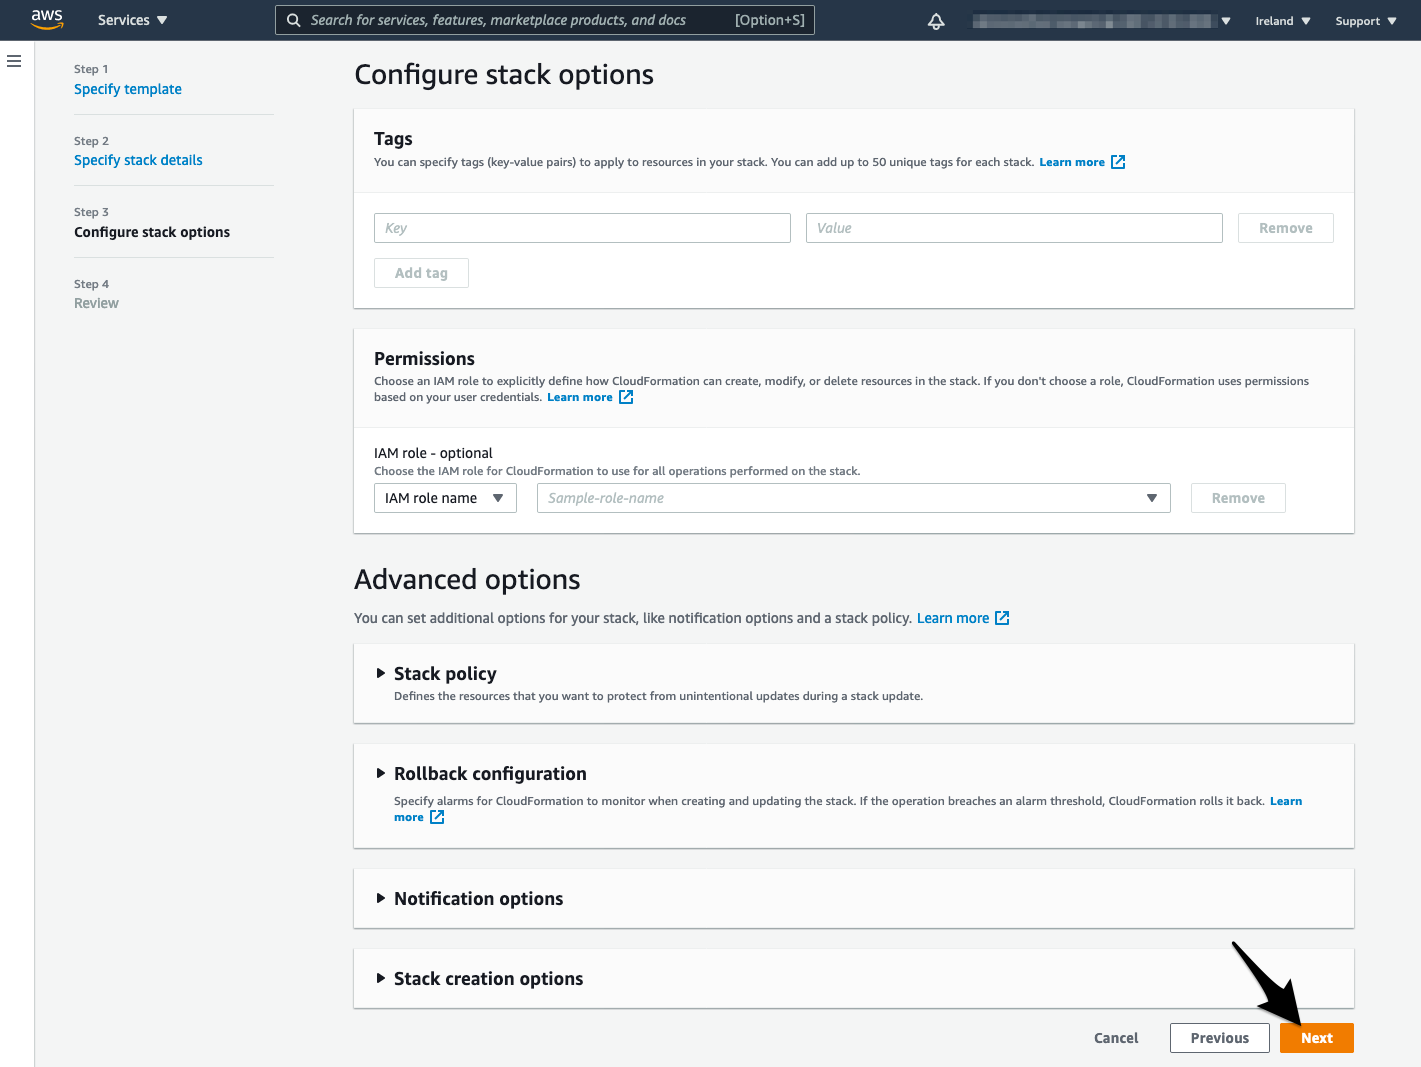
- Click Next in the Configure stack options page
- Acknowledge that CloudFormation might create IAM resources with custom names and click Create stack
- You will see the stack creation which should be complete within some minutes.

3. Run the MLOps pipeline
This is how your pipeline looks now:
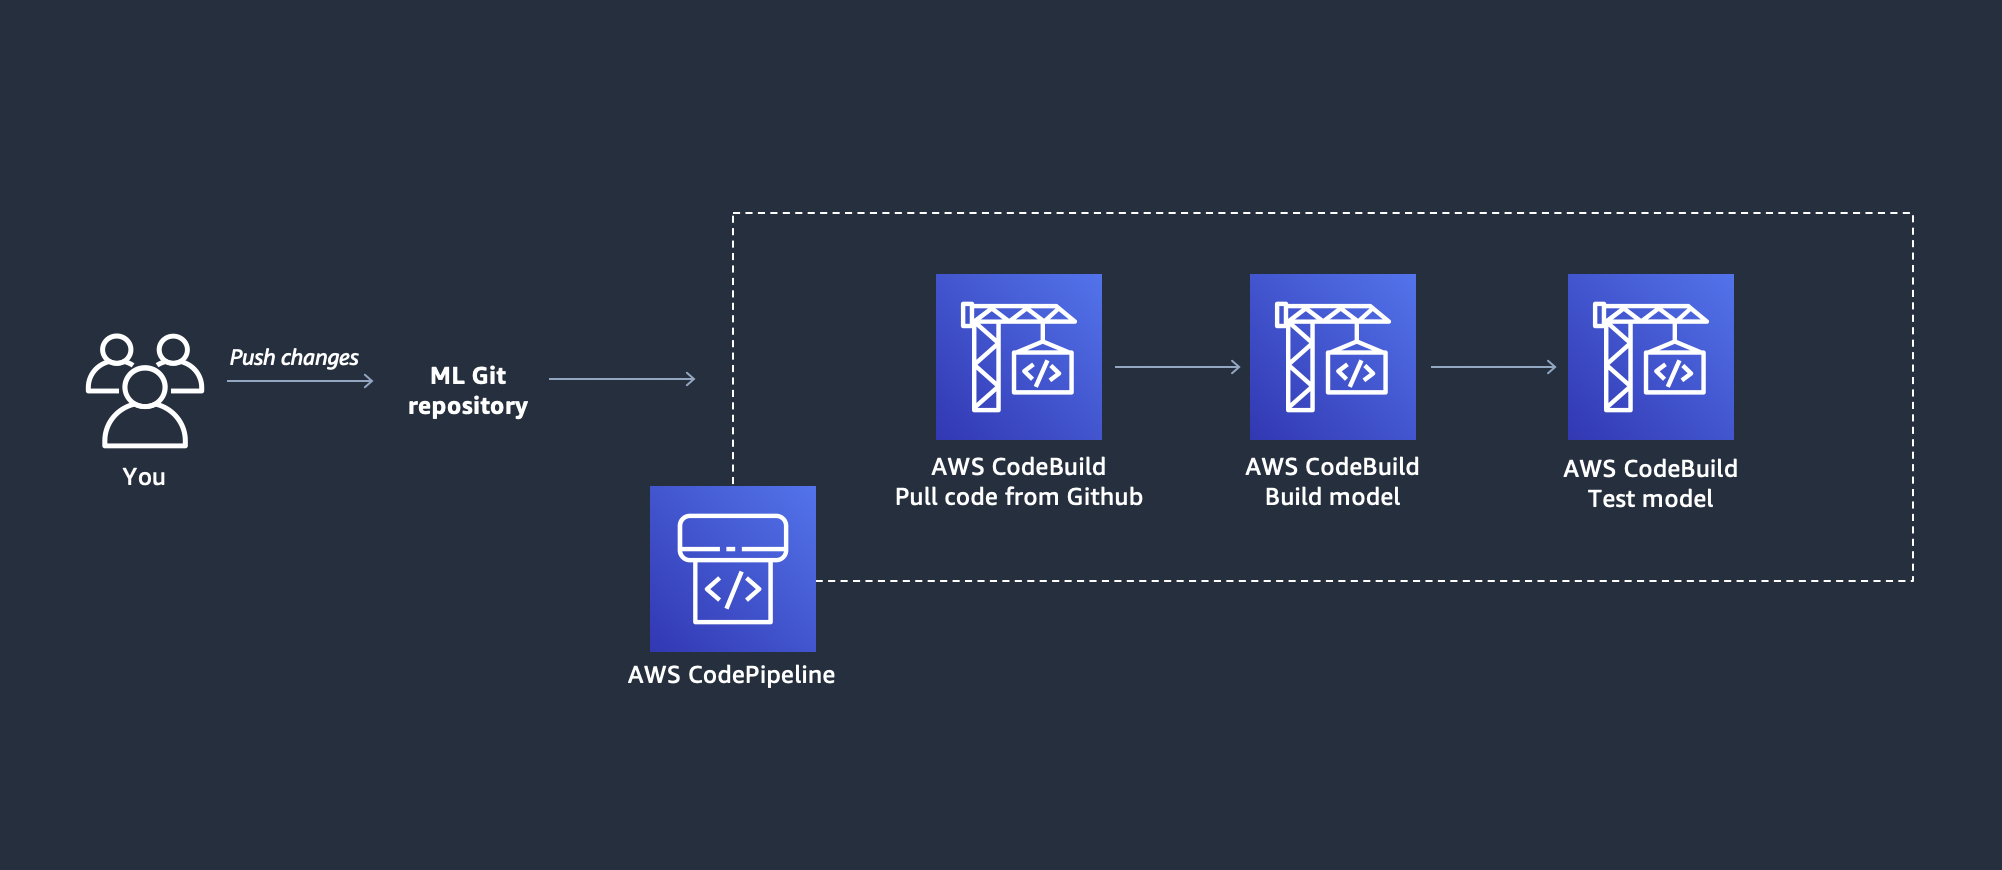
Now that you created CI/CD pipeline, it’s time to start experimenting with it.
- Navigate to the CodePipeline service
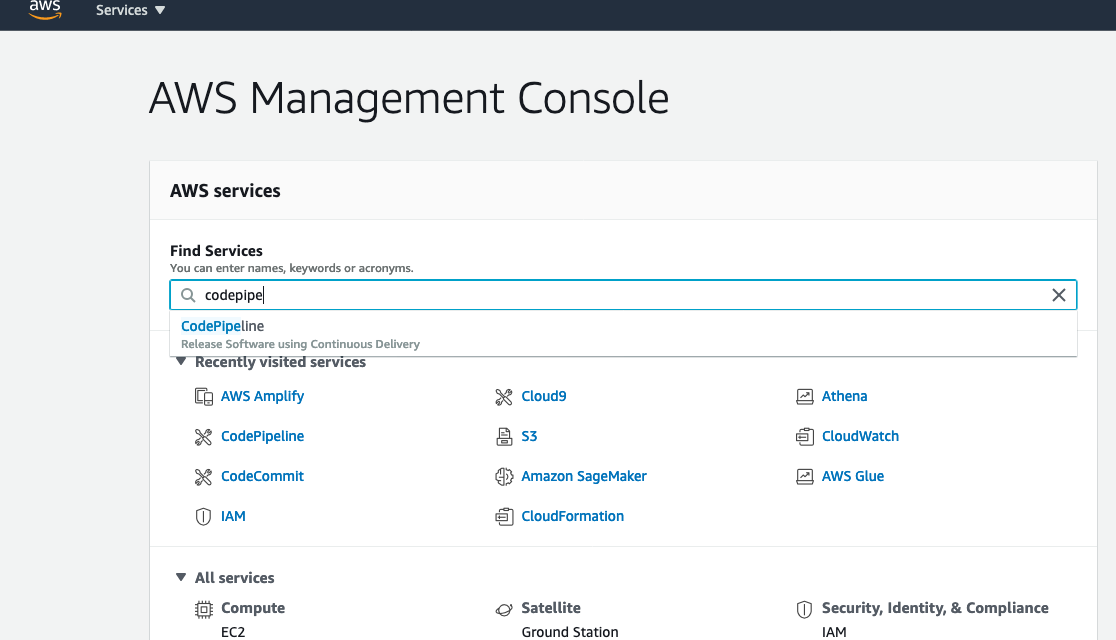
- Select your created pipeline
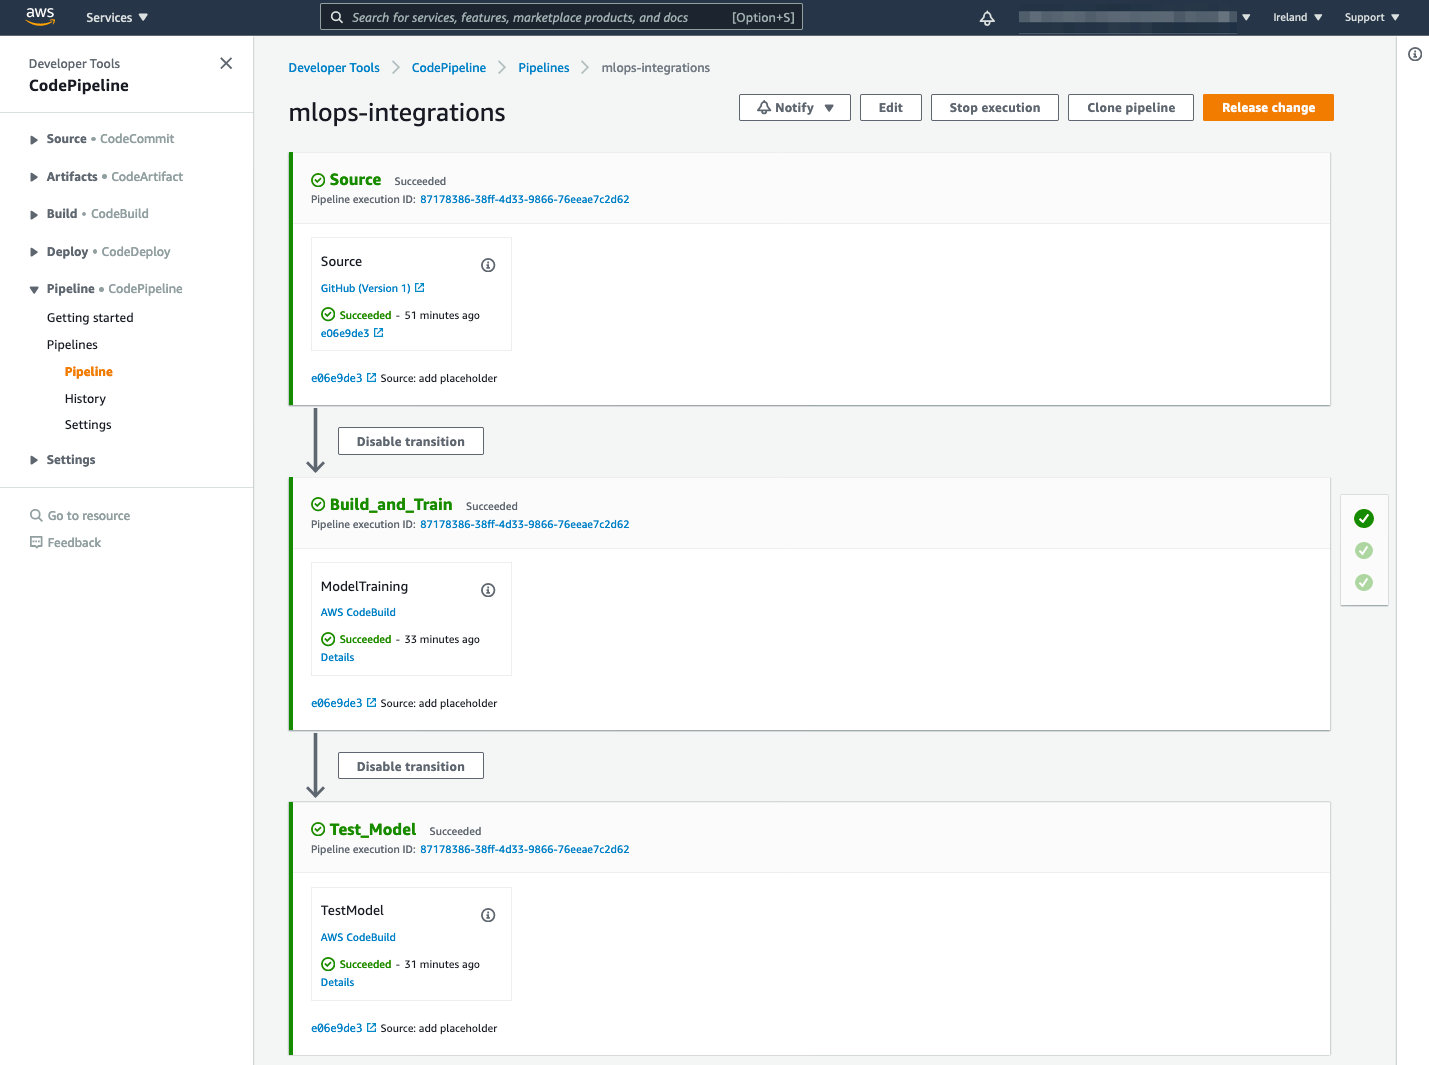
- The steps include:
- Source: pulls code every time submit changes. Can be triggered manually by clicking on the Release change button.
- Build_and_train: executes the
source\training.pyscript. This downloads the data uploads to an S3 bucket creates a training job and deploys the model - Test_Model: executes the
source\test.pyscript that performs a basic test of the deployed model
We will now make changes to this code in order to improve the model. The goal is to show you how you can focus on model implementation, and have CodePipeline perform training steps automatically every time you push changes to the GitHub repo.
4. Use GPU and Spot instances
Modify
instance_type = "ml.p3.2xlarge"in thesource\training.pyscriptIn the
source\training.pyscript uncomment these lines:use_spot_instances = True # Use a spot instancemax_run = 300 # Max training timemax_wait = 600 # Max training time + spot waiting time
After making these changes your PyTorch estimator should be like this:
estimator = PyTorch(
                  entry_point="code/mnist.py",
                    role=role,
                    framework_version="1.4.0",
                    instance_count=2,
                    instance_type="ml.p3.2xlarge",
                    py_version="py3",
                    use_spot_instances=True,  # Use a spot instance
                    max_run=300,  # Max training time
                    max_wait=600,  # Max training time + spot waiting time
                    hyperparameters={"epochs": 14, "backend": "gloo"},
                    )
Commit and push changes to your GitHub repository
At Git Bash run the following commands:
git status
git add .`
git commit -m "MLOPs code remote upload from the local repository"
git push
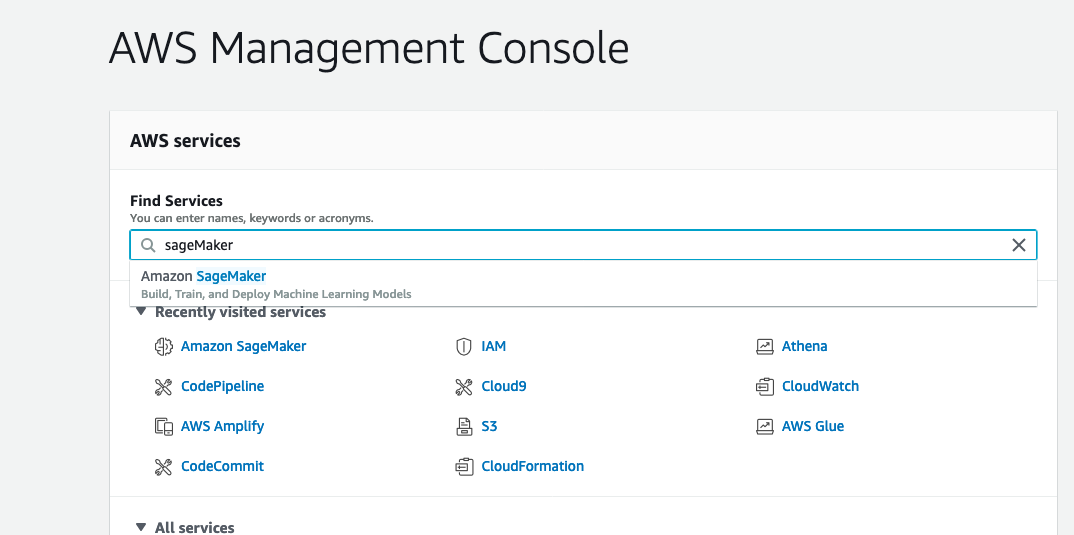
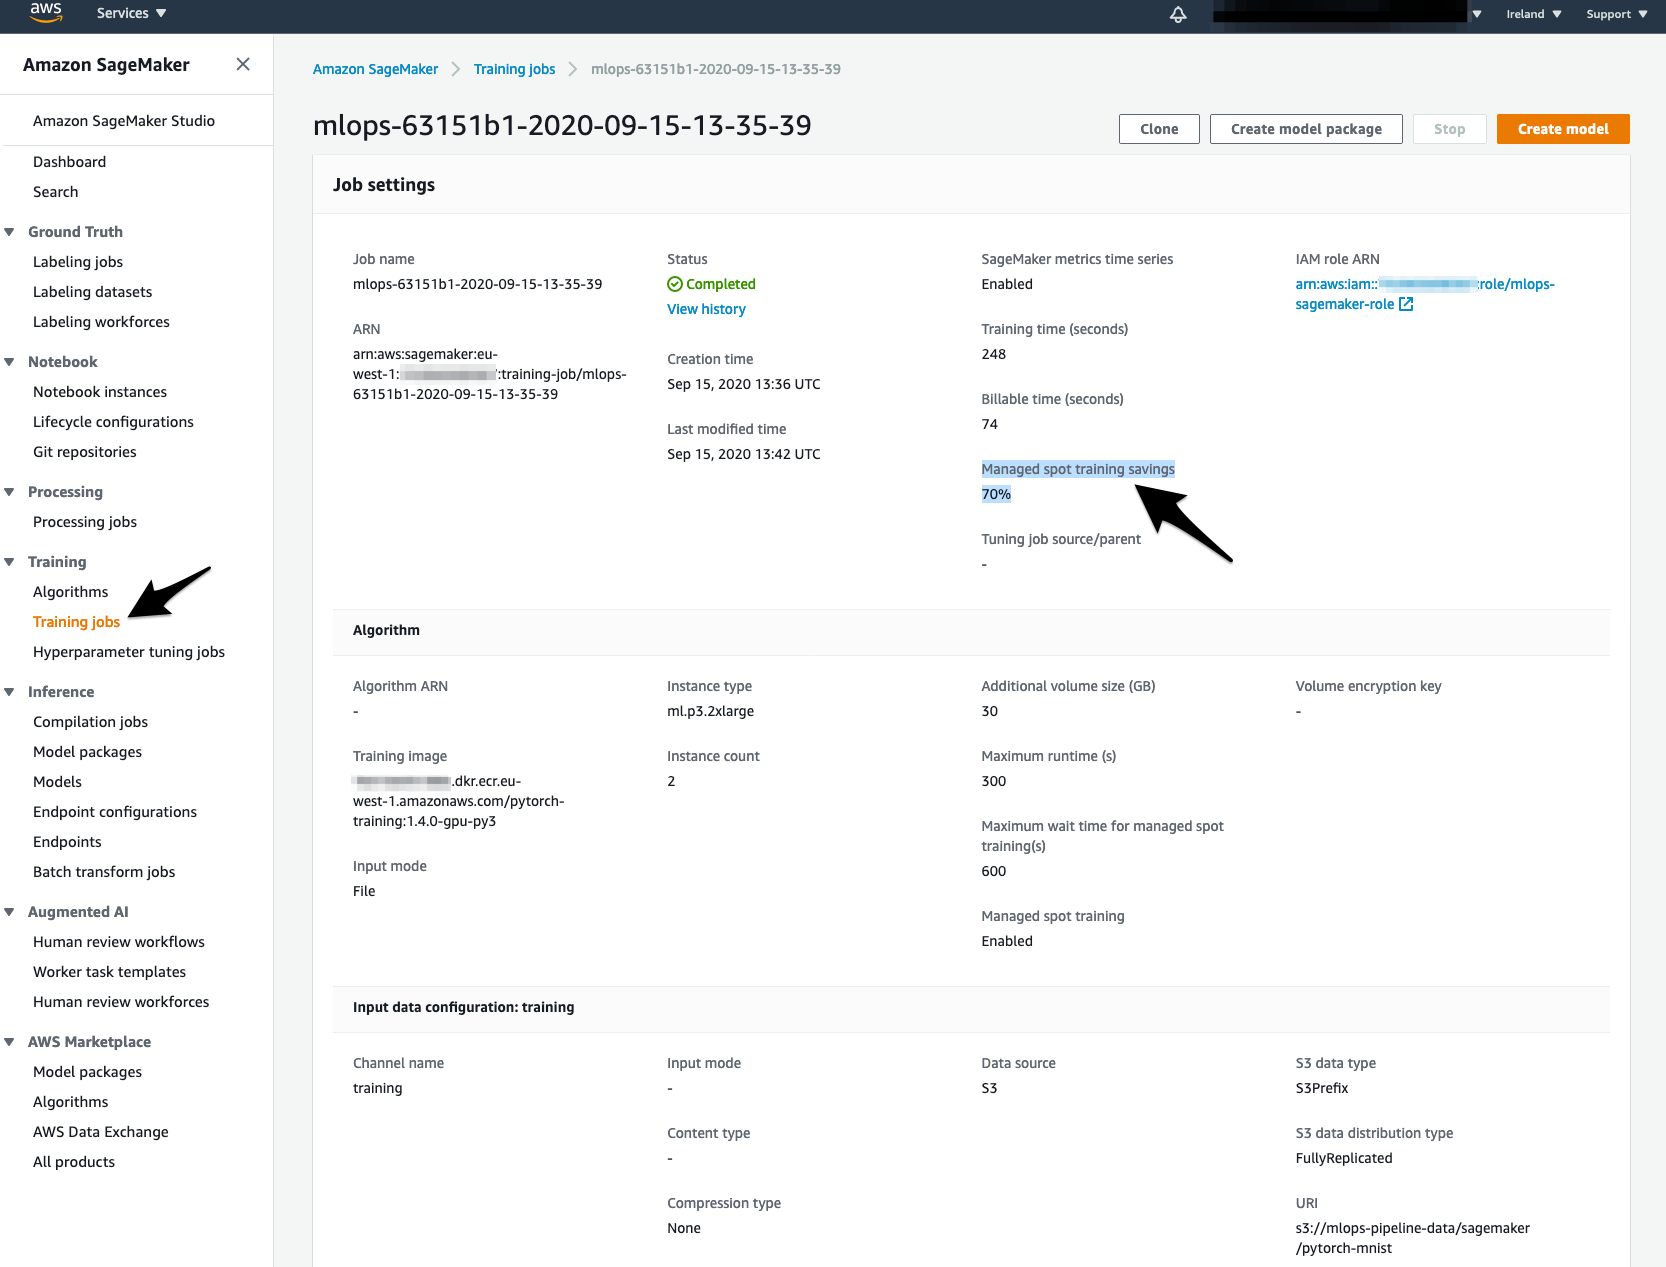
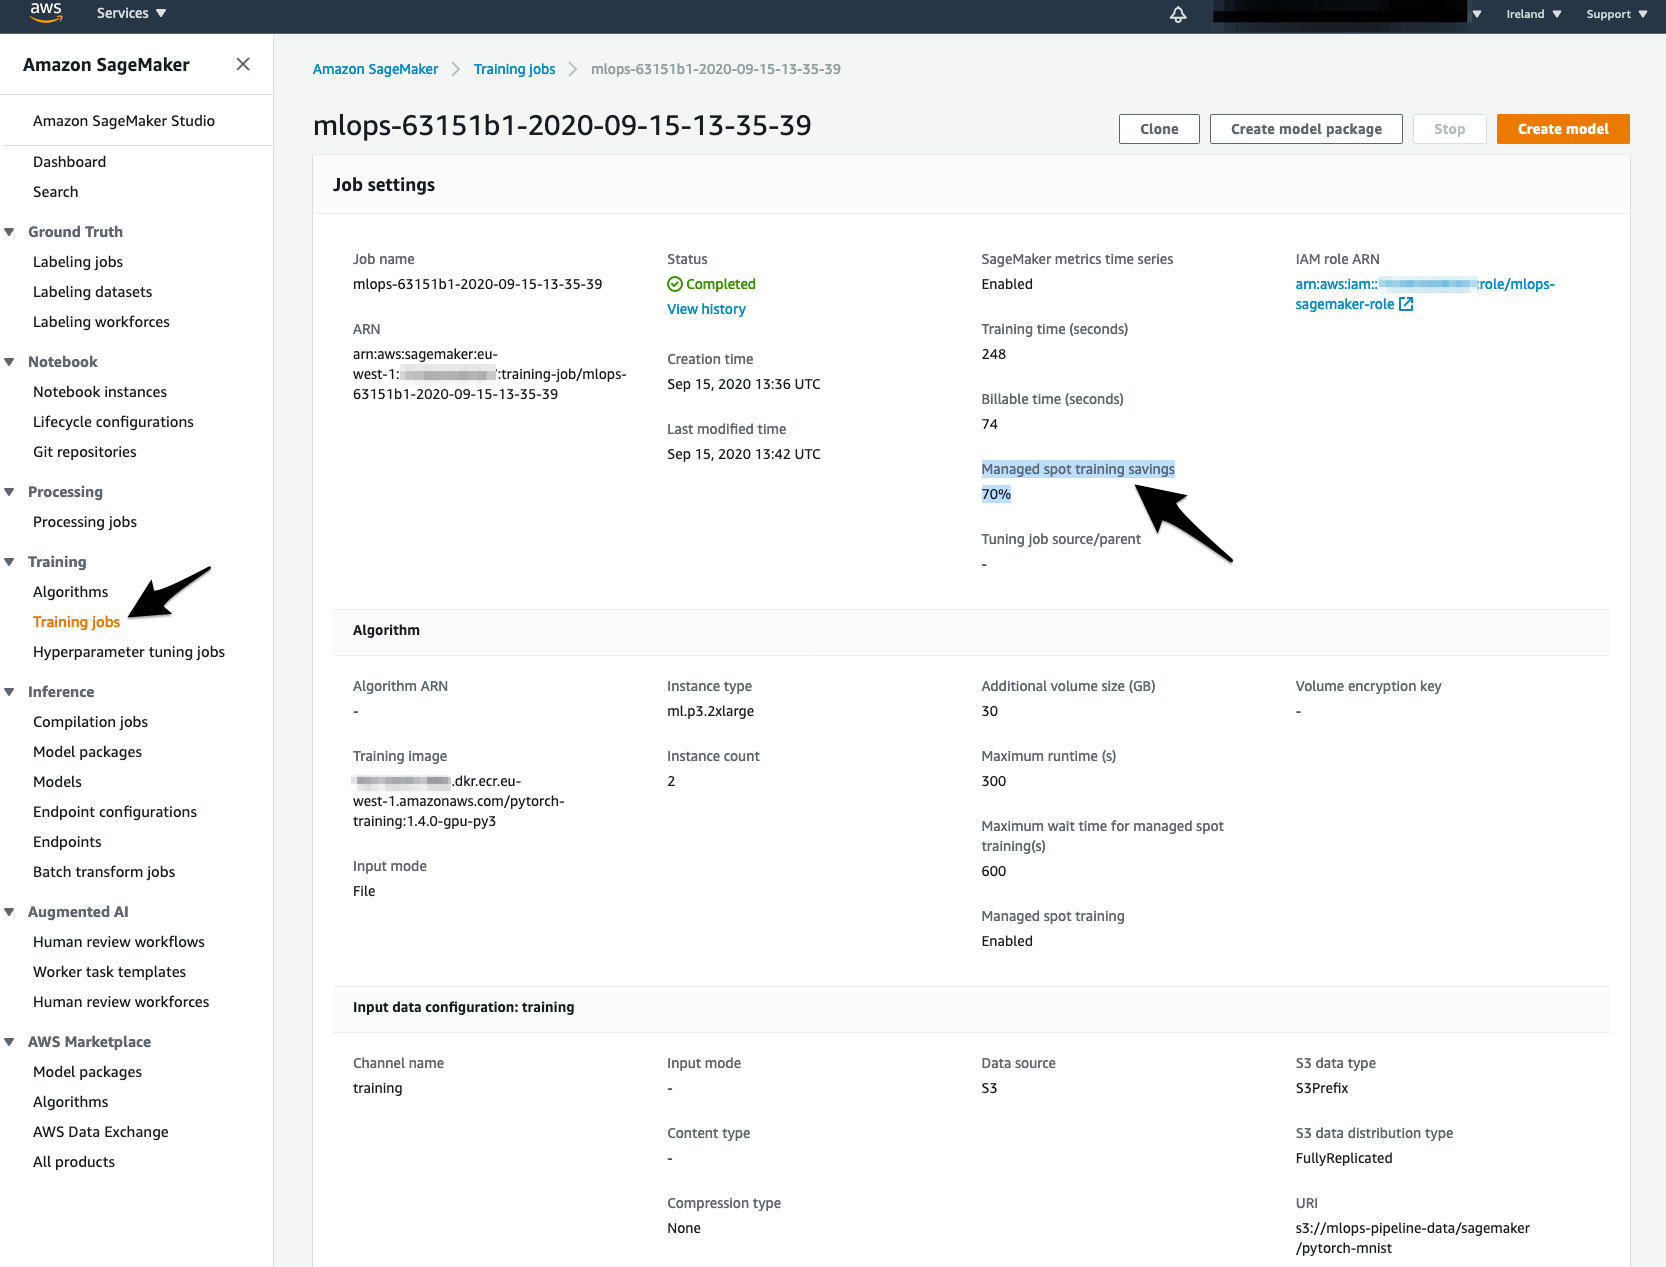
Navigate to SageMaker Training jobs.
- Check to see Manage Spot Training Savings
5. Add the training job dependencies
In the
source\training.pyscript uncomment the following linesource_dir = "codeIn the
source\training.pyscript update entry_point toentry_point="mnist.py"This line will tell SageMaker to first install defined dependencies from
code/requirements.txt, and then to upload all code inside of this folder to your container.Your estimator should now look like this:
estimator = PyTorch(
                  entry_point="mnist.py",
                    source_dir="code",
                    role=role,  f
                    ramework_version="1.4.0",
                    instance_count=2,
                    instance_type="ml.p3.2xlarge",
                    py_version="py3",
                    use_spot_instances=True,  # Use a spot instance
                    max_run=300,  # Max training time
                    max_wait=600,  # Max training time + spot waiting time
                    hyperparameters={"epochs": 14, "backend": "gloo"},
                    )
In order to do training with your new code, you should just commit and push changes to your GitHub repo as you did before!
Now after some minutes, in the AWS console inside SageMaker and section Training jobs you will see the new job being executed.
6. Trigger training job from the local Git repository
In this section, you will trigger training jobs from your local machine without the need to commit and push every time.
- Use or Create AWS Access keys
- Install AWS CLI
Set up your AWS CLI
aws configure

AWS Access Key ID [None]: enter your AWS Access Key ID

AWS Secret Access Key [None]: enter your AWS Secret Access Key

Default region name [None]: eu-west-1

Default output format [None]: json
Create a virtual environment inside your project
cd source
python3 -m venv venv
source venv/bin/activate
Install required dependencies
pip install -r requirements.txtNavigate to CloudFormation service stacks
Select the stack created earlier and go to the output section

Copy the ExampleLocalCommand
python training.py arn:aws:iam::xxxxxxx:role/mlops-sagemaker-role bucket-name MODEL-NAME VERSIONIn the command line replace MODEL-NAME and VERSION and execute
Navigate to SageMaker Training jobs, check to see Manage Spot Training Savings
7. Deploy with Lambda function
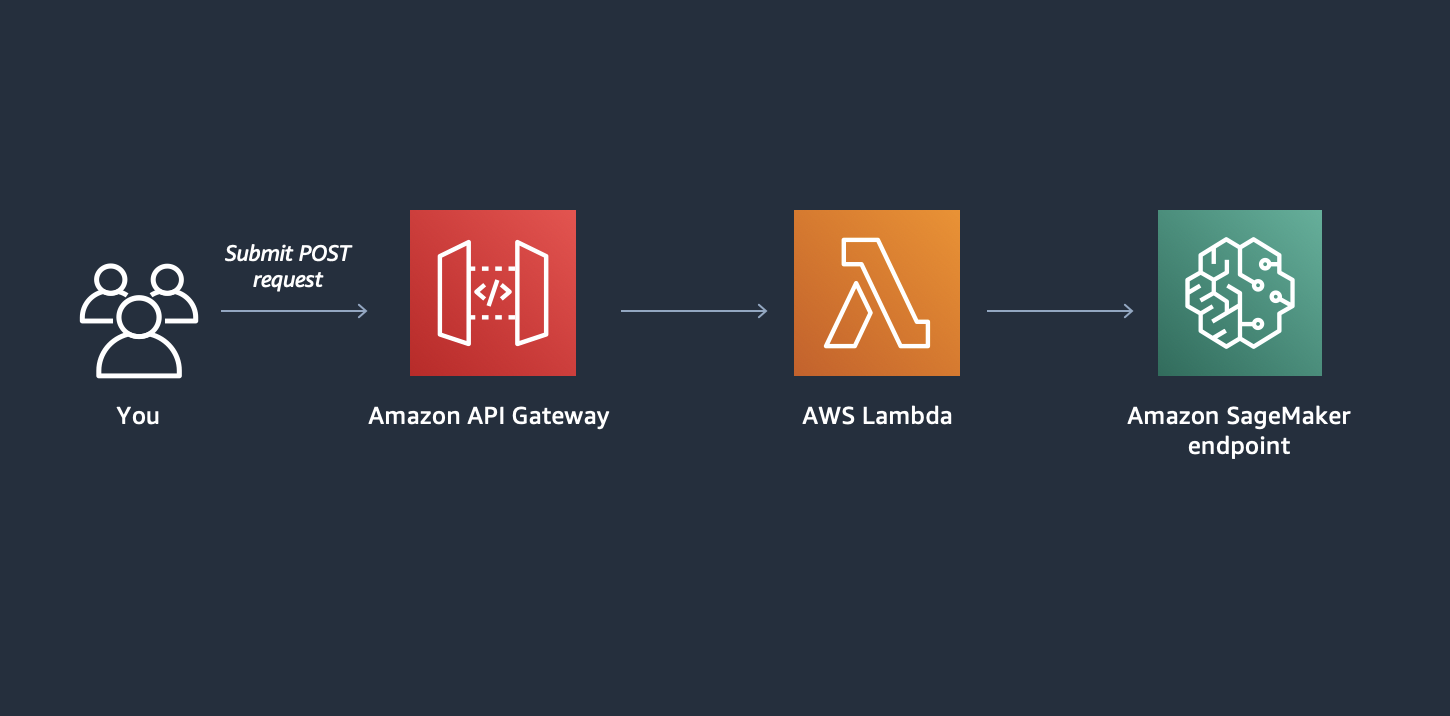
Now that we have a working SageMaker endpoint, we can integrate it with other AWS services. In this lab, you will create API Gateway and Lambda function.
This architecture will enable us to quickly test our endpoint through a simple HTTP POST request.
- Install Chalice
Go to the lambda folder and install chalice
pip install -r requirements-dev.txt
or run
pip install chalice==1.20.0
- Navigate to your SageMaker Endpoint in the AWS console and copy the name of the endpoint

In the lambda\.chalice\config.json update the value of the ENDPOINT_NAME environment variable with the name of your SageMaker endpoint
{
"version": "2.0",
"app_name": "predictor",
"autogen_policy": false,
"automatic_layer": true,
"environment_variables": {
	"ENDPOINT_NAME": "name-of-your-sagemaker-endpoint"
    },
    "stages": {
      "dev": {
        "api_gateway_stage": "api"
      }
    }
 }
Deploy the Lambda function
Let’s now deploy this Lambda by running
chalice deploy --stage dev
Make sure to run this command from the lambda folder. If your deployment times out due to your connection, please add --connection-timeout 360 to your command.
Our Lambda function expects to receive an image in the request body. It then reshapes this image so it can be sent to our trained model. Finally, it receives response from the SageMaker endpoint and returns it to requester.
As we are exposing this Lambda function through REST API @app.route("/", methods=["POST"]), Chalice will deploy it behind the API Gateway that will route the incoming traffic to it.
- Trigger your Lambda
Now you can trigger this Lambda function by running included bash script
bash post.sh
This script will download an image, and send a POST request to your Lambda. The response will contain probabilities for this image and prediction made by the deployed model.
{
"response" : {
	"Probabilities:" : "[[-3.10787258e+01 -1.61031952e+02 -2.43714166e+00 -2.35641022e+01\n  -1.84978195e+02 -9.14689526e-02 -5.73226471e+01 -8.57289124e+01\n  -7.99111023e+01 -9.30446320e+01]]",
    "This is your number:" : "5"
    }
}